Last updated: October 24, 2026
Key Takeaways
- A final walkthrough is a closing-day check, not a second inspection.
- Bring the contract, repair list, receipts, and a camera phone.
- Make one pass through the home, then revisit only problem areas.
- Prioritize repairs in the contract or repair addendum, since those are the clearest obligations to enforce.
A final walkthrough is the buyer’s last chance to confirm that the home is in the condition the contract requires before the closing papers are signed. In How to Handle a Final Walkthrough Before Closing, the goal is a quick check: verify repairs, test basics, confirm the seller has moved out, and make sure utilities still work long enough to avoid a surprise at move-in.
What the final walkthrough is for, and what it is not
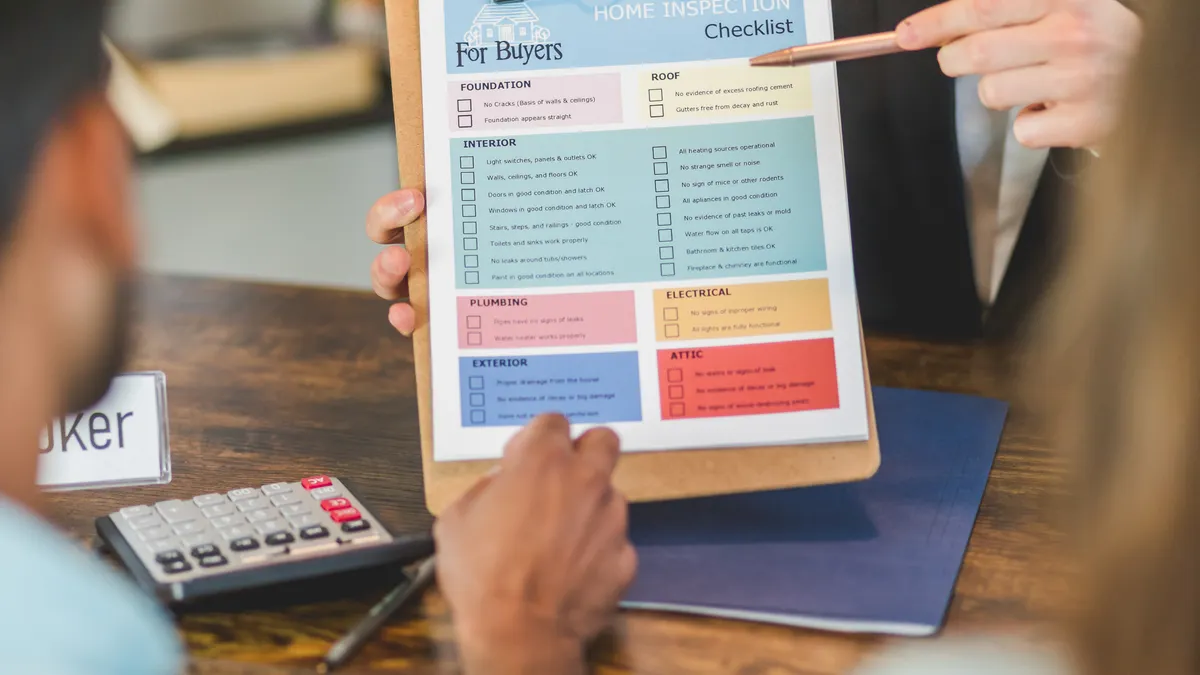
The final walkthrough is not a second home inspection. It is a closing-day check that the house still matches the deal you made, including agreed repairs and the condition of items that should stay with the property. If you expect it to uncover every defect, you will use it wrong.
The purpose is narrow: verify the seller left the property in the agreed state, confirm that obvious damage did not appear after the inspection, and make sure fixtures, appliances, and systems that were supposed to stay are still there and functioning. If a contract says a refrigerator, washer, or light fixture stays, this is the moment to confirm it is present. If a repair receipt was promised, this is the moment to ask for it.
A final walkthrough usually happens shortly before closing, often on the same day or within a day or two. That timing matters because you want the condition to be current. A walkthrough done a week earlier can miss a broken sink, a missing microwave, or a trash-filled garage after move-out.
This step is not for renegotiating every minor blemish in the house. Scuffed paint, worn carpet, or old cabinets are usually not the issue unless the contract specifically covered them. The question is simpler: did the seller do what was agreed, and is the home still in the same usable condition as when you last saw it?
If you are early in the buying process, the broader guide to buying a home can help with the steps that come before this one. For related closing-day context, see buying a home and home inspection.
What to bring to the final walkthrough
Bring the contract, the inspection repair list, repair receipts, and a phone with a camera. Those four things make it much easier to spot a mismatch and document it in real time. A paper copy still helps because phone service can be unreliable in basements, garages, or rural homes.
Use the repair addendum or amended contract as your checklist, not memory. Many buyers think they will remember “that leak in the guest bath,” then forget whether the repair was supposed to include a new shutoff valve, a resealed tub, or both. The contract language controls, so keep it in front of you.
A flashlight is useful even in a home with good daylight. Cabinets, attics, crawl spaces, under-sink plumbing, and the back of a washer closet can hide problems that do not show up in a bright living room. A simple outlet tester is also worth carrying if you want to check a few outlets quickly, though it is not a substitute for a full electrical inspection.
If your buyer’s agent is joining you, ask them to bring the same documents. A real estate agent can help compare what you see with what the seller promised, and that comparison matters more than a general impression of whether the home looks “fine.” For licensed guidance, the Consumer Financial Protection Bureau also advises buyers to review closing documents and confirm the home is ready before settlement.
Take photos if anything is off, even if the issue seems small. A missing light bulb, a dented appliance door, or a cracked window pane can become useful if the seller later says it was already that way. Documentation is cheap; confusion at closing is not.
How to do the final walkthrough step by step

Do the walkthrough in one pass from the front door to the back of the home, then a second pass only for any problem areas. That structure keeps the visit focused and prevents a 20-minute walkthrough from turning into an hour of wandering.
- Start outside and look for new damage. Check the front door, garage door, windows, siding, and any porch or patio spaces for breakage, missing parts, or fresh stains. You are looking for changes since the last visit, not cosmetic issues that were already there.
- Confirm the seller has moved out. Rooms should be empty unless the contract lists items that stay. A sofa left behind is not a detail to shrug off; it can delay cleanup, disposal, or even closing if the contract requires a vacant property.
- Test the major systems quickly. Turn on faucets, flush toilets, run a few lights, and check the HVAC if the season makes that practical. You do not need to perform a full diagnostic, but you do want to know the water runs, drains, and the heat or cooling responds.
- Check agreed repairs one by one. Compare each item against the repair list and receipts. If the seller said a roofer fixed a leak, look for the repaired area and ask for the receipt or invoice. If the plumber replaced a part under the sink, open the cabinet and look for signs of the work.
- Test appliances that are supposed to stay. Open the oven, run the dishwasher for a short cycle if time allows, and make sure the refrigerator, garbage disposal, and laundry hookups are present if included in the sale. A missing appliance or a dead unit can matter more than a cosmetic issue.
- Check utilities and anything that needs power. The electricity, water, and gas should be on long enough for the walkthrough to confirm basic function. If a utility is off, ask why before closing; a shutoff can hide leaks, prevent testing, or signal that the seller has not fully transferred service.
- Look for debris, trash, and leftover items. Garage shelves, attics, closets, and the backyard often collect the last of the seller’s belongings. If the contract requires a broom-clean or empty property, this is where you notice whether that standard was met.
- Write down every issue before you leave. List the item, its location, and whether it is a repair problem, a missing item, or leftover debris. That note becomes the basis for your agent’s call to the seller’s side.
The key is speed with focus. You are not trying to become a contractor in 15 minutes. You are trying to make sure the home you are buying is the home you agreed to buy.
Which repairs and receipts matter most
The repairs that matter most are the ones written into the contract or repair addendum, because those are the only ones you can clearly hold the seller to. A verbal promise in a hallway does not carry the same weight as a signed repair agreement.
Look first at water, roof, electrical, heating, and structural items. Those tend to create the biggest risk if they were left half-finished. A patch on drywall is one thing; a leaking supply line under a bathroom sink is another. The same is true for electrical work. If a repair was supposed to bring something up to code or make it safe, a cosmetic cover-up is not enough.
Ask for repair receipts or invoices when the contract calls for them. A receipt can show who did the work, when it was done, and whether parts were replaced. It does not guarantee quality, but it gives you a paper trail. If you were told the work was completed by a licensed tradesperson, the receipt should at least identify the company or contractor. For a consumer overview of home repairs and records, see the Federal Trade Commission’s advice on using written estimates and receipts.
Do not let a seller substitute vague reassurance for proof. “It’s fixed” is not useful if the repair involved a leak behind a wall or a malfunctioning furnace. If the work is not visible, receipts and photos become more important.
If the repair looks incomplete, do not guess. Note exactly what is missing: the sink still drips, the cracked tile was never replaced, the attic access hatch is still loose, or the fence gate still will not latch. Precision helps the seller’s agent respond faster and keeps the issue from getting blurred into a general complaint.
This is also where the final walkthrough can be misused. It is not the moment to reopen a long list of inspection defects that were never part of the repair agreement. That creates noise, not leverage. Focus on the repairs that were promised and the condition that should have changed before closing.
How to handle appliance testing, utilities, and move-out problems
Test the appliances and utilities only far enough to confirm they are present and functional, then stop. A final walkthrough is not the time for a full load of laundry or a long cooking test. A quick run is enough to catch the obvious failures that would affect move-in.
Start with the items that are easiest to confirm: refrigerator, oven, dishwasher, disposal, washer and dryer hookups, and any built-in microwave. Open the doors, check that knobs and controls are there, and make sure power is on. If the appliance should be included in the sale, its absence is a walkthrough problem, not a mystery for later.
Utilities matter because a home can look fine while hiding a problem. Water should run at sinks and flush toilets. Electricity should power lights and outlets. If the heat or air conditioning is part of the season’s practical check, turn the thermostat and wait long enough to hear or feel a response. If the utility company has already switched service or a meter is off, ask for an explanation before closing.
Move-out problems are common because they are obvious at the exact wrong time. Leftover furniture, trash bags, clothes in a closet, or food in the pantry can all signal that the seller has not finished. A little junk in a garage might seem minor, but it can become a closing issue if the contract promised a vacant property or broom-clean condition.
The cost of ignoring leftovers is usually delay and leverage lost after the closing papers are signed. Once closing happens, you may be the one arranging removal. That is why the correct response is to raise the issue immediately and ask your real estate agent to contact the seller’s side before you sign.
If the problem is small and the seller is still nearby, you may be able to get a quick fix, like removing an item or sending over a receipt. If the problem is larger, such as a broken appliance or a utility that cannot be tested, you need the seller’s response before you decide whether to proceed. For closing coordination, it can help to review local closing costs and home warranty options before signing.
What to do if the walkthrough finds a problem
Stop and get the issue in writing before closing. A clear note, a photo, and a call from your agent can prevent a small problem from turning into a stale argument after the sale.
First, identify whether the issue is a missing item, a repair that was not completed, new damage, or a utility problem. Those are different problems with different fixes. A missing dining room chandelier is not the same as a water leak under the kitchen sink.
Next, tell your real estate agent immediately. The agent can contact the seller’s agent and compare the finding to the contract. If you are at the property with the seller’s agent, keep the discussion factual. Say what you saw, where you saw it, and what the contract says should be there.
Then decide whether the issue is big enough to pause closing. Small cosmetic problems often get handled with a credit, a quick repair, or a promise to finish after closing if that is acceptable and documented. Bigger issues, such as active leaks, missing appliances that were included, or substantial uncompleted repairs, may justify delaying closing until the problem is fixed.
This is where judgment matters. A final walkthrough should protect you, but it should not turn every imperfect detail into a crisis. If the issue changes the home’s condition, value, or habitability in a real way, it deserves attention. If it is a minor scuff on a wall that was already there, it probably does not.
The smartest move is to know the difference before you arrive. That way you are not making a closing-day decision from irritation or surprise alone.
What should I check during a final walkthrough?
Check the items the contract makes important: completed repairs, appliances that stay, utilities, seller move-out, and new damage. The first pass should be practical, not decorative. Open cabinets, run water, test a few lights, and compare the home to the repair list and any receipts. Focus on what changed since the last visit.
Can I delay closing if something is wrong?
Yes, if the problem is serious enough and your contract or lender allows a delay. The first step is to tell your real estate agent immediately so the seller’s side can respond before papers are signed. Small cosmetic issues may not justify a delay, but missing appliances, uncompleted repairs, or active damage often deserve escalation.
What if the seller left items behind?
Tell your agent before closing and document the items with photos. The first response should be to ask the seller to remove them or agree to a written solution. Left-behind furniture, trash, or boxes can delay closing if the contract requires a vacant or broom-clean home, and they are easier to resolve before signing than after.
Drafted with AI; not yet reviewed by a person.